Showing posts with label Altered Art. Show all posts

Thursday, October 1, 2015

Take time.....

TO DO WHAT YOU WANT.....


What an AMAZING stamp created by Yvonne Blair Designs!!!
I DID start this project with a class in mind....
when it wasn't turning out how I had envisioned it
....I let the creative process have it's way.

I had begun with applying Multi Medium to a canvas
then I spritzed a page from a
1973-1974 McCall's Needlework and Crafts Magazine
and squinched it into the Multi Medium.
I dried it with my heat tool then applied a layer of
Perfect Paints ~ Pearl Plaster ~ Bavarian Cream.
It wasn't the look I was looking for so I began to randomly
tear off the magazine page....
This is when I fell in LOVE
with what happened!
(sorry I wish I had a picture for you)


I then pulled out Perfect Paints ~ White Stucco
and randomly applied it to the canvas with a palette knife.
and applied it all over the canvas.
I waited a minute then wiped off the excess with a baby wipe.
I LOVED how this worked as it "stuck" to the
White Stucco but not to the Pearl Plaster.


I had created a Perfect Paints Shimmering Matte Acrylic Spray
by mixing equal parts of Bright Gold and Aged Copper
with an equal part of water.
I spritzed it on my canvas and let it drip.....
I wasn't quite happy so I stenciled a bit of
Perfect Paints ~ Shimmering Matte Acrylic ~ Shadow
through The Crafter's Workshop stencil ~ Thoughts!


I used a lot of "misfits" to finish off my canvas.
A previously stenciled and spritzed
A leftover torn piece of CCB C Flute ~ Kraft
that I used to sop up leftover paint.
I scrap piece of vintage lace.


All tied up with a piece of Jute and
finished off with Yvonne Blair Designs stamp.


Now to get back to creating the background for my
upcoming class......
HAPPY CREATING!!


Wednesday, August 14, 2013

Blog Hop Left~Overs!!

Happy Wednesday.....Die~Namites Die Fans....

As I was trying to figure out what to make for my post this week.
I came across the left~overs from my Premier Blog Hop video...
So, I decided to finish my mini ~ canvas!


I used the Knobby Branch Die


See the "pieces parts" of the Knobby Branch and
Budding Branch dies??!??!


For the background off my canvas,
I did a bit of image transfer,
then was a bit heavy handed with
Viva Decor's Transparent Crackle Paint.
When it was dry,
I added a bit of Gold Precious Metal Effect Paint,
spritzed it with a bit of water....
and watched the magic happen!!

In case you missed my video.....
here is a repeat!

Make sure to Subscribe to the Die~Namites Dies YouTube Channel
so you don't miss out!!!


Products Used:
Die~Namites Dies
Knobby Branch
Budding Branch

Petaloo
Darjeeling Dahlias ~ Grey Black

Splash of Color
Precious Metal Effect Paint
Mother of Pearl
Gold

Twinkling H20's
Rain Forest
Sweet Alfalfa
Pretty Peridot
Olive Vine

Transparent Crackle Paint
Crackle Base Coat ~ Porous

Life as Art Words


Friday, August 9, 2013

Die~Namites Dies Blog Hop!!

Welcome to the “Premiere” Die~Namites Dies Blog Hop.


We are so happy that you have chosen to join us!!!
Our blog hop will be from August 9th ~ August 11th.
Along the way, you will see creations by our Die~Namite Design Team
using the LATEST release of Die~Namites Dies.

The Die~Namites Design Team Members will be sharing with you
how they made their pieces through video and picture tutorials.
Each of the Die~Namites Design Team Members
will have a secret word.....on their blogs.

Collect all the words, make sure to leave a little love,
to find the secret phrase this will give you one entry into our prize drawing.
You will receive additional entries for
Liking us on Facebook Signing up for Email Notifications.


We will be awarding one
Grand Prize of a $50 Gift Certificate to Die~Namites Dies
and 5 ~ $10 Gift Certificates to Die~Namites Dies.

So enough about the logistics....
LET THE HOP BEGIN.... 
Lynne Forsythe.....you are here!!!
Die~Namites Dies


If you have arrived here from Susie’s blog you are in the right place. 
If you have just arrived in the midst of our Blog Hop 
please head to the Die~Namites Blog.

HERE IS MY CREATION.....


I had tons of fun working with the 


If you notice....I used "pieces parts" of the dies
I chose...


and I just love this saying....


Check out my video on how I
used the "pieces parts" of the
Knobby Branch
and Budding Branch dies!!

Here is how I created with
"Pieces of a Whole" die!!


My secret word is: CAN'TS

Now head on over to the Die~Namites blog to 
finish the “Premiere” Die~Namites Blog Hop!!

Monday, July 8, 2013

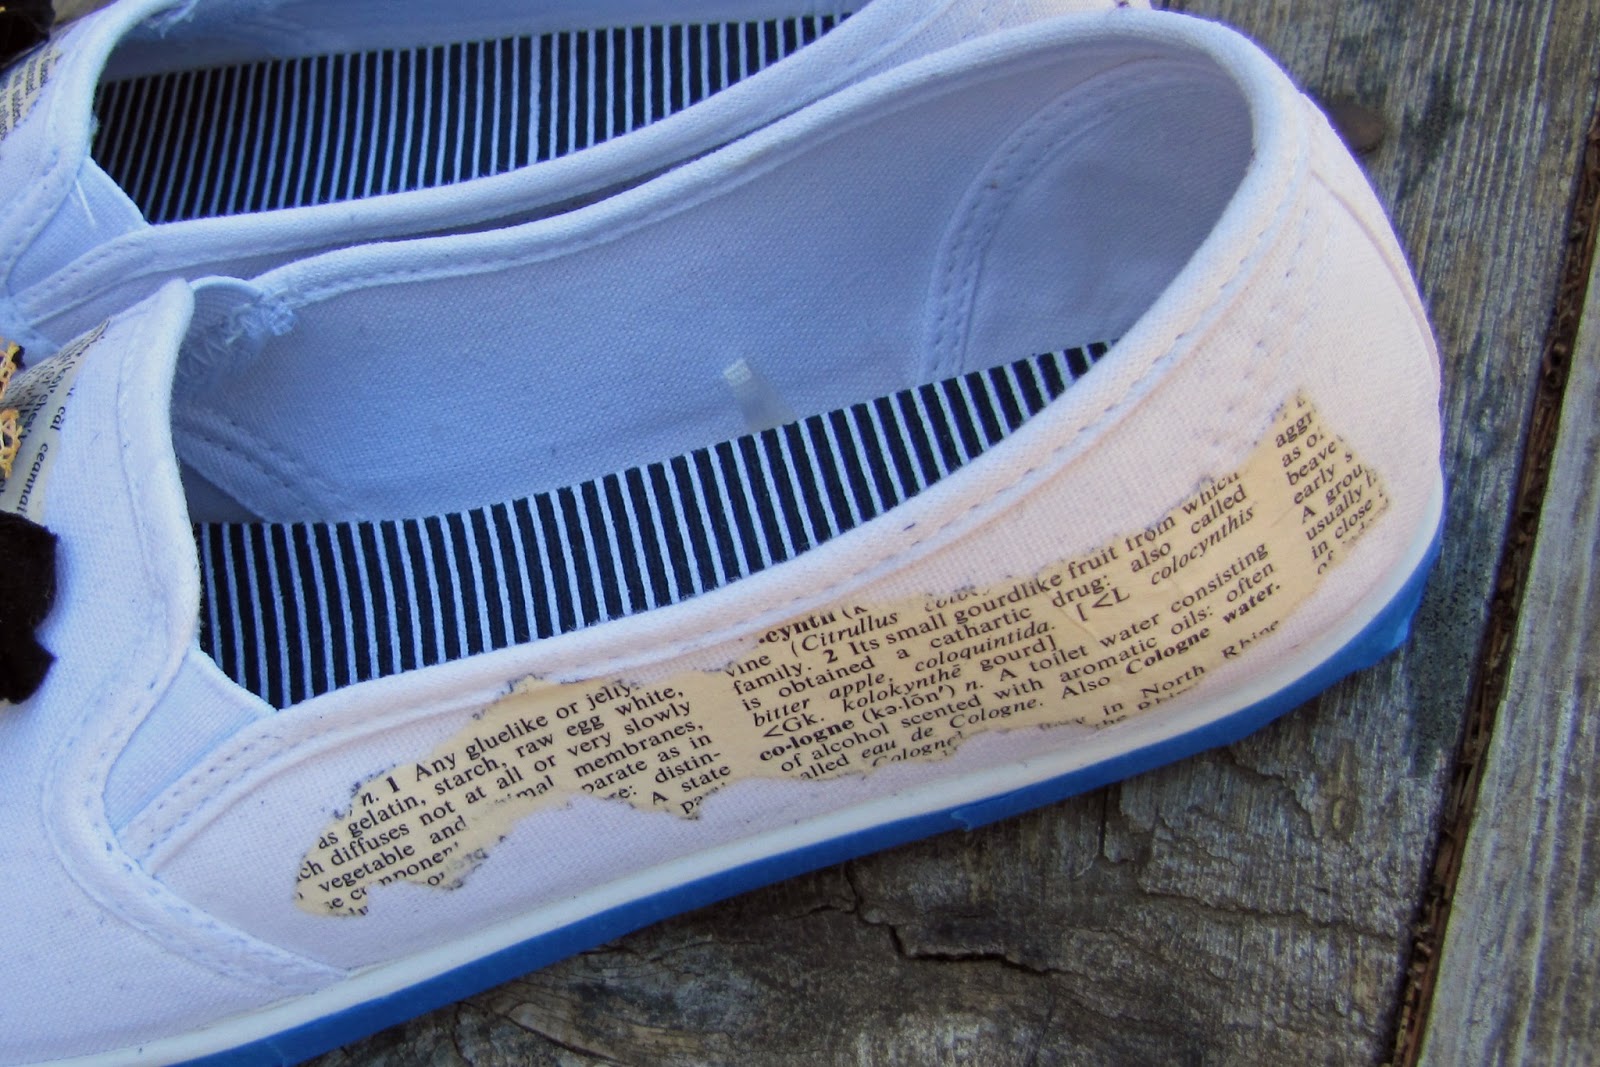
Snazzy Summer Sneakers

I wanted to share with you a little creation I made back in the Spring.


They were such a hit.....
I decided to share with you how I made them!!


Tape off the rubber sole and side of shoes with painters tape.

Tear up a sheet of dictionary paper.
Apply “damp” dictionary paper randomly to shoes with Multi Medium. Dry

Using Template, apply 2 colors (shown Mediterranean Blue and Pretty Peridot) 
of Silk Acrylic Glaze randomly on shoe, allowing each application to dry between layers.


Ink “Cooped up Stamp” with Archival Ink and stamp randomly on shoes. 


Brayer 3rd color of Silk Acrylic Glaze (shown Spiced Pumpkin) on Craft Mat.
Dab stamp into Glaze and stamp randomly on shoes (5 times per shoe).
Dry. Dot flowers with Pearl Pen. Dry.


Spritz left over paint on Craft Mat with water and dip Seam Binding in liquid.
Dry. Tie in a large loopy bow.
Tie a large Loopy bow with Black Cord and vintage lace.


Using Tattered Floral Die, cut (2) large Velvet Flowers.
Apply Multi Medium to back of Velvet flowers while drying crumple flowers. 

Create “Flower Cluster” by layering:
Colored Loopy Bow
Vintage Lace Blow
Black Velvet Flower
Large Mesh Flower
Small Mesh Flower
Small Textured Flower


Adhere layers together with hot glue gun. Adhere “Flower Cluster” to sneaker.
Tuck black cording loopy bow at front of “Flower Cluster”.
All adhered with hot glue gun.

Remove painters tape. If desired, paint sides of shoe soles. 


Hope you enjoyed my Snazzy Sneakers!!!

Materials Used
Petaloo
Mini Textured Flowers ~ Salmon
Mixed Textured ~ Amber (Large Mesh Flowers)
Mixed Textured ~ Teal (Small Mesh Flowers)

Splash of Color 
Silk Acrylic Glaze:
Mediterranean Blue
Pretty Peridot
Spiced Pumpkin
Viva Colour ~ Cream Pearl Pen

The Crafter’s Workshop
Mini Cell Theory Template

Unity Stamp ~ Christy Thomlinson
Cooped Up Notes

Stampers Anonymous ~ Wendy Vecchi
Plaid Posey

Ranger/Tim Holtz
Archival Ink
Multi Medium
Craft Sheet
Tattered Floral die

Canvas Corp
Black Velvet
Black Cord

Misc Products
Stencil Brush
Hot Glue Gun
Vintage Lace

Monday, May 6, 2013

NYC or bust.....

Howdy Peeps.....

Here is my "NYC ARTSY" canvas bag
I created for Winter CHA ~ 2013. 
I designed and created the canvas bag
from Canvas Corp ~ Canvas.
and embellished with the New York Destination Papers
Along with.....LOTS of Viva Colour Pearl Pens!!! 


I began by image transfering various images from
the New York Destination Collection
to different size pieces of Canvas Corp ~ Canvas
using Claudine Hellmuth's ~ Multi Medium ~ Matte.


I chose to use Pearl Pens to color 
the canvas bag and embellies
because they are fully washable when dry!!
What an AWESOME FEATURE!!!

SOOOO....I dipped the caps of the Pearl Pens
into puddles of Pearl Pen and stamped with it,
colored the Petaloo Canvas Flowers with it...
and I found that if I spritzed it with
water or my favorite Radiant Rain Shimmering Mist
when freshly applied....
they could be easily manipulated.
.....and it splatters REALLY WELL, too!!! 
A good example is the matching wallet I made.

http://lynneforsythe.blogspot.com/


I love that it is even dimensional!!!
Hope you have enjoyed my ARTSY creation as
much as I did making it!!!

Products used:

Splash of Color
New York Destination Collection
Monarch Canvas Flowers 
Monarch ~ Canvas Shapes 
Viva Colour ~ Pearl Pens
30065 ~ Orange
30064 ~ Sunny
30073 ~ Copper
30070 ~ Black

Luminarte ~ Silks Acrylic Glaze
Stargazer

Luminarte ~ Radiant Rain Shimmering Mist
26395 ~ Ginger Peach 
26465 ~ Persimmon

Petaloo ~ CMC ~ Canvas Flowers