Showing posts with label Polishing Plaster. Show all posts

Monday, May 8, 2017

Free Create Day......


I try to carve out at least one creative session a week 
that is a FREE CREATE!

Today, was one of those day.....
I had some rather grueling paper work to do
so I thought I put my happy hat on first!

Now this is a doubly inspired post....
It began with the Reach For the Stars Workshop
being hosted by 4 AMAZING designers.
Miranda Edney
Tiffany Solorio
Jaya Raghuvanshi
Georgie Connelly


My first inspiration 
was  Jaya Raghuvanshi's project,
which was FABULOUS!

Then I saw the latest mood board


My second inspiration....
color, flowers, wood etc.

Sooooo I combined the two and this is what I ended up with
Here is what I came up with.....


Products Used.....
Tattered Angels
Glimmer Mist
Precious Metals
Aquamarine
Kraft

Glimmer Glam
Lime Cordial

Canvas CorpPrinted Cardboard ~ Time
Cardstock ~ Kraft

UmWowStudio
Amazing chippie
Hexagon Confetti Stencil

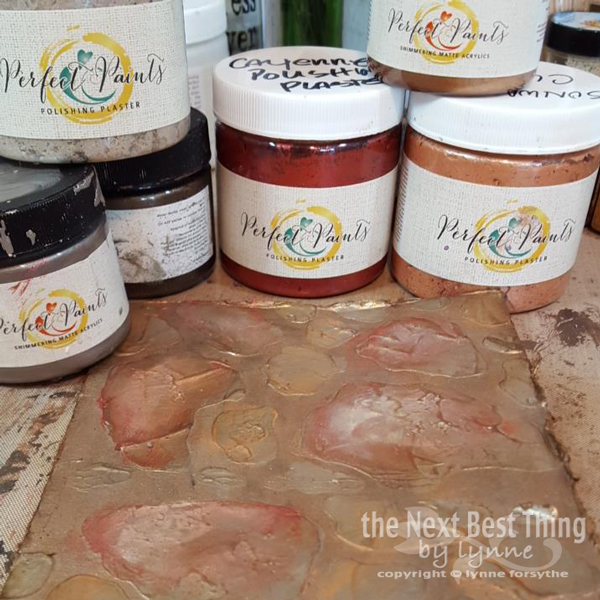
Perfect Paints
Polishing Plaster ~ Dove's Wings

Wednesday, July 13, 2016

Free Create Day


I LOVE when I have a 
FREE CREATE DAY....
when I don't have a creative assignment...
and I GET TO CHOOSE 
what I want to play with!!

YESTERDAY was one of those days...


I had a package of
(2) Pack of Color Burst
some The Crafter's Workshop stencils
Stencil Folk Art Flower
Repeating Pods
Layered Flower Bits
a jar of Perfect Paints 

....and I let the creative process flow!

For all the cards,
I applied various Color Burst colors
to the Water Media Card.
I love that you can soak these cards and they
stay FLAT!
Then I stenciled over the the colored background

From there I tried something different on each card.
For this card I painted on Yellow Gold ~ Liquid Metallics
over the Polishing Plaster.


For the second card....
I JUST LOVED
how the Color Burst seeped into the Polishing Plaster
to cause a "transparent" look.


....see!
I chose to leave this background AS IS!


For the last card I painted over the Polishing Plaster
with various colors from the Earthtones 6-Pack.


All three of my cards have sentiments from
Impression Obsession / Yvonne Blair Designs
stamped on CCB Kraft Cardstock with
Ranger ~ Archival Ink ~ Watering Can.


For my second card I painted UmWowStudio chippies 
with Gesso, then painted on a bit of the
Earthtone Color Burst.
Added a few Petaloo Blooms!


The last card....


I hope you have enjoyed my creative journey!
It felt AMAZING to free create!!

Thursday, June 23, 2016

LAUGH.....heart!


Hey y'all....
guess it's been a little while since I
created for myself....
I seem to be in some type of a creative funk lately...
so I decided to challenge myself!
So I headed to Walmart and the clearance section
and this is what I found.....

.....I put them in my basket, cashed out and headed home.
The first thing I saw when I returned home was
an 11" x 14" art board, so I grabbed it
along with some goodies to work with.


Tattered Angels
High Impact ~ Olive

Ranger
Multi Medium Matte

And I let the LAYERING BEGIN!!


I cut up my purchased trims
into various shapes and sizes
added a piece of sheet music
and some mesh drywall tape,
laid it all out and then
adhered EVERYTHING with
Multi Medium.

I applied a layer of Organic Sugar using
my handy dandy Catalyst Wedge -02
LOVE THIS THING!


When dry, I painted on a layer a mixture of
Bavarian Cream and Glaze Medium.

Now for the scary part....
I mixed a 50/50 amount of
Glaze Medium and Espresso
and applied it randomly on my canvas...
waited then wiped it off with baby wipes.
Phew....I liked the look!

I applied a bit of Gesso over the finished canvas.
Now to build....
to follow along with the "mesh" look
I cut a piece of wire mesh and
stapled it to the art board.


Here is the finished canvas.....


I pulled out a Canvas Corp ~ Burlap heart
 I had previously cut from my 'Tovers pile
and built on it
with a Canvas Corp ~ Canvas heart
another heart cut from one of the trims
a larger vintage sheet music heart
finished off with a Canvas Corp ~ Flute heart.


But it just didn't seem complete so I pulled out
a few UmWowStudio Chippies
Leafy Mash
and applied a layer of diluted 
Organic Sugar for texture.
When dry I painted on some
 Tattered Angels ~ Olive.
The PERFECT POP!


Here are a few more close-ups of my creation...


I finished off my lovely with a
Petaloo Mini Garden Rosette
and a bit of vintage trim.

I hope you enjoyed my clearance Challenge
as much as I did!!!
Now to find a place on my wall to hang this!


Friday, May 20, 2016

It is WHAT it is...

Where do you get you inspiration??
While on a walk with my grandson I
came across this garbage can cover....
and I just had to snap a picture!


When the opportunity arose
I pulled out a bunch of Perfect Paints
and got lost in the creative process.


a bit of Shimmering Matte Acrylic Paint
some Polishing Plaster
Glaze Medium
and some "homemade" spray.

I began with a gesso'ed burlap canvas
added a layer of black gesso
and then a thin layer of
a 50/50 mixture of Glaze and Aged Copper,
which i wiped most of it off!
Then let the layering begin.


I dabbed on paint with various sponges
I mixed colors together
I combined paint and polishing plaster
all to achieve various looks and textures!

JUST LOVE THE LOOK!


Once my background was complete
the question arose....
WHAT OH WHAT to do now!
I must have stared at the canvas for a day.....


I pulled out various Petaloo blooms
the tag I had been using my 'TOVERs on
zipper parts
wire mesh
a bit of halloween netting.....


Here are a few close ups....


Tuesday, May 3, 2016

Butterflies and BLOOMS

Hello my friends....
I want to say a BIG THANK YOU
to my girl Rachel Kleinman
for her post on Facebook about this months
CHALLENGE
over at The Mixed Media Monthly Challenge!


It just so happened I had a project in the works
that I could use to fit this challenge!!


I had been trying out some new Perfect Paint products
and using a new technique, I had just learned, of rubbing on
Polishing Plaster with my finger.
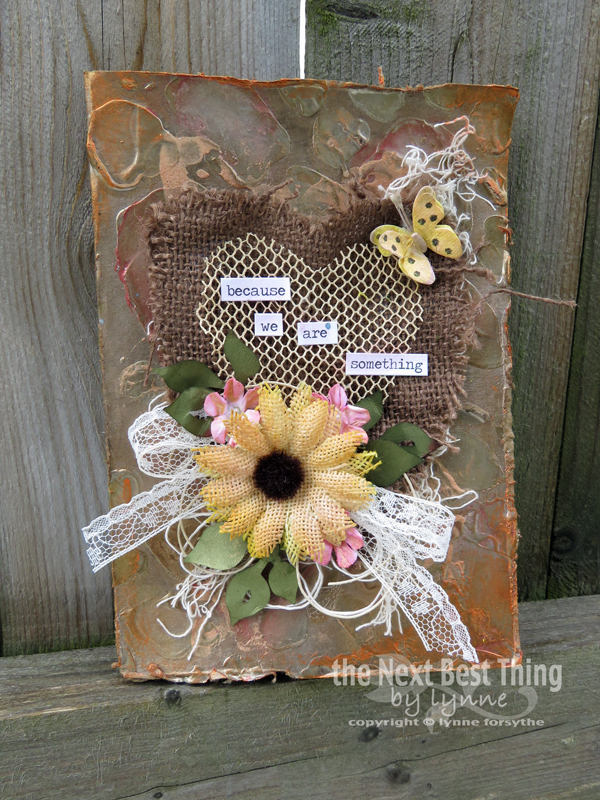
I was able to create this rather cool background
using this technique.


I don't know if you've noticed??
...but, I've had this thing for hearts.....lately,
ok, so yes, I will admit, A LOT!
So, why should this creation be any different??
and one from a bit of vintage curtain
that was just laying around.


I had a few 'TOVERS I chose to use,
the Bloom part of the challenge, a Petaloo Sunflower
and some ivy leaves.


I added a few Petaloo ~ Mini Pearl Daisies colored with
I also added a little of the same color,
to the previously colored Sunflower.


Last but not least......a Butterfly
another part of the challenge!

I hope you have enjoyed my creation for
and I challenge YOU to play along!

Wednesday, April 13, 2016

Paper Hearts and a Challenge


Soooo.....I was talking with Cheryl Mezzetti upon her 
return from the Scrapbook Expo in Grapvine, TX.
She was ECSTATIC about the response of
her PERFECT PAINTS
(I'm not surprised!!!)
She spent the weekend sharing the AMAZINGNESS
of her products and my post today
is about a "challenge" she gave me.


together to create another color

I had already begun a canvas and had been unsure
at that point, where I was going with it....
I now knew...
I had a "challenge"!!!

I apologize, there are very few step out photos,
this was truly a creative endeavor,
one to get lost in....and I did!

I began with a 14" x 18" canvas,
and cut (3) hearts from various vintage papers
and adhered them to the canvas.
I pulled out several The Crafter's Workshop stencils
and applied various Perfect Paints mediums through them....
Organic Matter Mask ~ Perfect Clear Texture Gel
Netting ~ White Stucco
Raven Mosaic ~ Cayenne ~ Polishing Plaster
when dry I painted on a layer of
Perfect Glaze Medium
over the entire canvas.


....my response to challenge #1

I stepped right out of my color box on this one...
Shimmering Matte Acrylics
Ballet Slipper and
my new LOVE ~ Vintage Mercury
which I folded into
Organic Sugar ~ Polishing Plaster


I masked off my hearts
with the original heart patterns
and lathered on the concoction!

Now came my answer to challenge #2

together to create another color.

My color choices


I added a bit of 
Perfect Glaze Medium to help with opacity as
I wanted to see the music in my large
"Paper Heart".


Each heart was "colored" differently.
Did I say.....
I LOVE Vintage Mercury??


Each time, using the leftover "color" on the
background of my canvas.

Suddenly, I was stuck....
I had no idea how to finish the canvas!
Until I received a box from
Canvas Corp Brands with
their new Mixed Media Origins Collection
ahhhh.....there it was
a pair of wings on the Grace paper.
I spritzed the paper with various amounts of water
and painted my "color" onto the wings.
I then cut the wings out....oh the LOVE!


I wanted to share with you
 a few more close ups of my canvas....


There are sooo many layers to this project
I can't even begin to tell you about them....
adhering string
painting tatting
coiled wire
toothpicks
big brush pens
vintage sign letters
and do overs!

.....all to achieve the finished project....


I hope you enjoyed my creative journey.....
I KNOW I DID!!

I hope you have a creative day.....