Showing posts with label Modeling Paste. Show all posts

Saturday, November 3, 2018

Fall Inspired Napkin Rings

I was inspired to create a Fall Tablescape.....so I did!


I typically make a pumpkin every fall but this year I've chosen to take it up a notch and make Napkin Rings and Coasters.


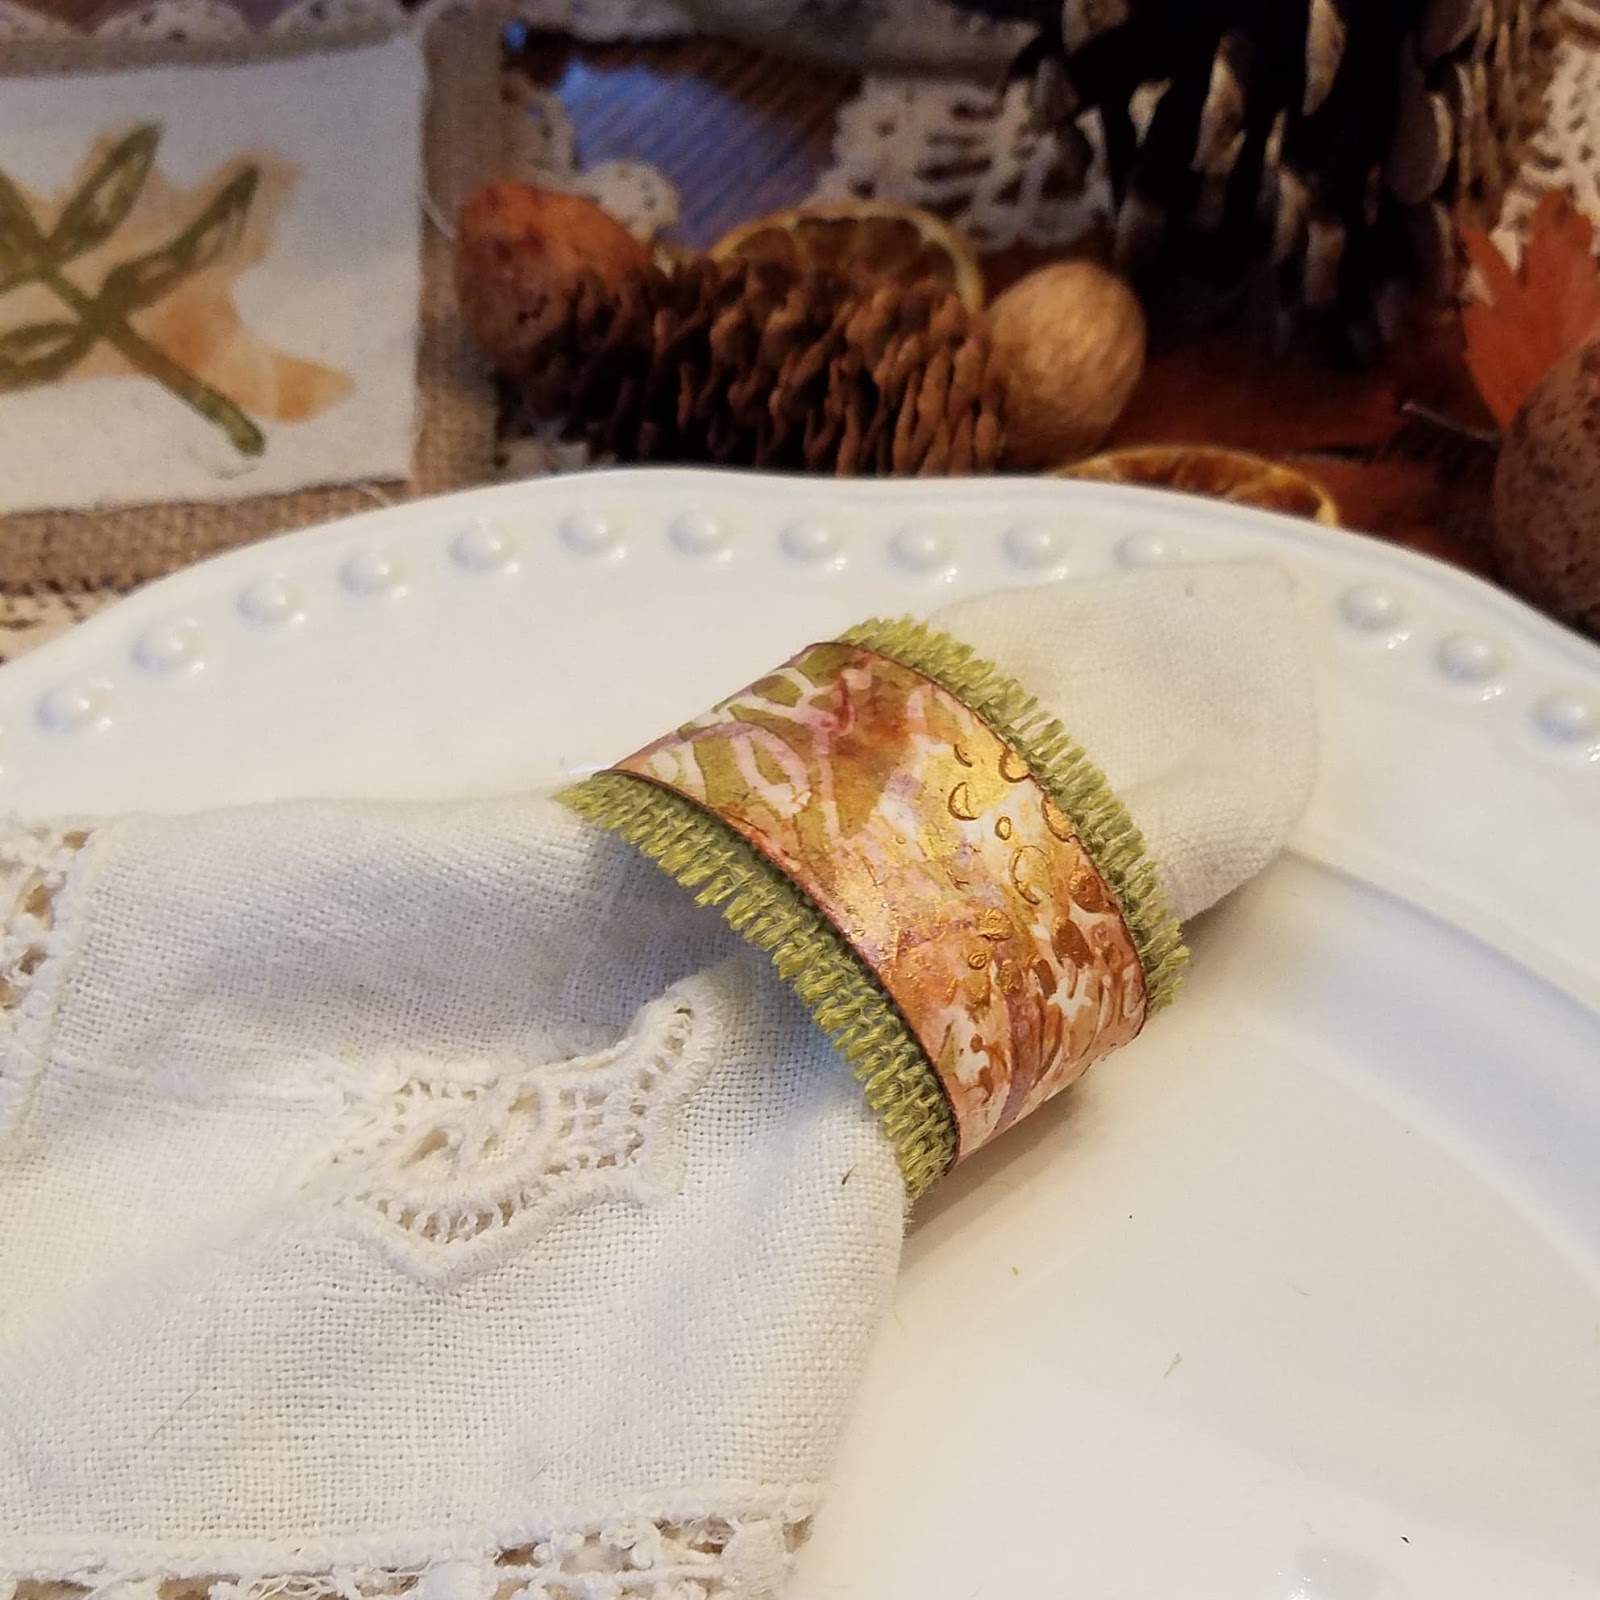
Watch how I created the "paper" using......


ArtFoamie Stamps,
Tattered Angels ~ High Impact Paints
The Crafter's Workshop ~ Modeling paste and 6x6 Stencil
Canvas Corp ~ papers
ThermoWeb


I hope you will take a peek!!


Thank you sooo MUCH for stoppin' by!
Be Creative

PRODUCTS USED
ArtFoamies
Art by Marlene ~ HexaGone, Leaf Geo
N Studio ~ Weave
Rebekah Meier Designs ~ Patio Tile


Tattered Angels
High Impact Paint


Canvas Corp
Tissue Stock ~ Kraft, White and French Script


The Crafter’s Workshop
Spotted Stencil 6x6

Grecian Gold Modeling Paste


ThermoWeb

Rebekah Meier Designs
Mixed Media Medium

6x6 Transfer Foil ~ Old Gold


Monday, February 19, 2018

Pantone Color of the Year ~ Ultra Violet


Welcome to the Pantone Color of the year ~ Ultra Violet challenge.
I have to say....violet or purple is not my favorite color to work with!
So, I decided to just jump in with both feet......
I pulled out a piece of Canvas Corp ~TissueStock
several stencils and a couple of colors of Violet
and a few tubs of The Crafter's Workshop ~ Modeling Paste
and began layering the colors.


As I said previously, I REALLY struggled with the purple.
So, to help tone it down a bit,
 I pulled out a bit of Tattered Angels ~ Glimmer Glam ~ Bon Bon
and dropped color onto my "made paper".


....even with all the layers, the TissueStock was still a bit flimsy
so I decided to adhered it to a piece of vintage sheet music.


As I was diggin' in my 'Tovers pile,
I found another piece of "made paper" with the same color palette
and a light bulb came on in my head.


I began to tear up my "made paper" and
adhered it to my found 'Tovers "made paper".


But, I still wasn't  TOTALLY happy so
I pulled out a bit of cheese cloth
and applied it to my "paper".


Then, I stenciled on a bit more of the Crafter's Workshop ~ Modeling paste.


...but it still wasn't quite finished yet.
So, I dropped a bit more "violet" onto my paper
and finished it off with some splatters
of The Crafter's Workshop ~ Gesso.


YEAH....now I was happy with my "Made Paper".
I cut it up into ATCs and made a few cards.

Here are my finished Ultra Violet cards....


Hope you enjoyed my journey of "Ultra Violet".

Products Used
Canvas Corp
TissueStock ~ Ivory
Greeting Cards
Burlap ~ Natural

Tattered Angels
Glimmer Glam
Fast Violet
Lilac
Bon Bon
Lime Cordial
Organic Garden

The Crafter's Workshop
Modeling Paste

White Pearl
Platinum
Marcasite Silver

White Gesso

Yvonne Blair Designs/Impression Obsession
French Script

Ranger 
Multi Medium ~ Matte
Archival Ink ~ Jet Black

Saturday, January 27, 2018

My Metallic Princess

Hi Everybody....
We've made it into the new year....2018
A new year calls for some new product.
....and I got my hands on the
NEW RELEASE
from The Crafter's Workshop.


And off I went, trying out the new product.
I ran it through stencils,
I lathered it on with a palette knife.
I applied it to fabric and paper. 
The only thing I found is it wasn't
fond of having the drying
 process accelerated by using a heat tool
but still faired well!


I applied a bit of Canvas Corp Tissue Stock
to a piece of CC Cardstock ~ Kraft.
Then I began the layering.
And layer I did....7 of them in fact
using TCW stencils, new and old.


I LOVED how this paper felt when I was finished
....almost like leather. Textured leather that is!

Now, what to make with my new paper??!??!
I went digging through my box of naked bases
and found a Chunky ATC.

I painted my wooden ATC with TCW paint.
Can I tell you it was hard to cut this paper
....but I did!


While my block was drying, I went in search of wing material.
I decided on a piece of CC Flute ~ Kraft
and I applied layers of Metallic Modeling paste.
Now, I have no idea what the tool is I used but
I ran it down the grooves of the paper
and let the modeling paste dry.


I then cut up the strip of paper and adhered it to my block.
I pulled out a bag of mixed wood parts
and picked out a few and painted them
with the modeling paste.
(it had great coverage)


I used Sizzix/Tim Holtz Distressed Doily
to cut the Metallic Princess' wings.


I painted a few vintage buttons with
the Modeling Paste and it worked WONDERFULLY,
one coat did the job.


I even pleated the paper and the Modeling Paste didn't crack!


She wouldn't be a princess without a crown.
I pulled out my UmWowStudio ~ Crown Mash,
picked a crown and painted it with more Modeling Paste.


This product gets a two thumbs up from me!

I hope you have enjoyed my creative journey. 
I still have more paper so be watching
to see what else I make.

Monday, November 12, 2012

SWIRLYDOOS blog hop

Welcome to Swirlydoos'
November Kit Reveal Blog Hop Block Party!!

If you came here from Petaloo's blog, then you are on the right track. 
If not, go back to Swirlydoos' blog and start from there. 
We have some amazing projects for you to see today
!!
Also, as an extra special twist, 1 of our designers 
is hiding secret prize on their blog!!!!! 
Make sure to leave a comment on all of the blogs for a chance to win!!! 
Check out Swirlydoos on Facebook and Like Us!!!


I have to say...this months Technique Kit is A~MAZING...
I had SOOOO much fun glooopin' and glooobin'
spritzing and a sprayin'!
I made a mini album with my Kit.

I colored the beautiful Petaloo flowers with the Gelatoos!!


I did change up the cover in my video a bit.....all good!

Here is how I made my little LOVER~LY!!


You have until midnight, eastern time, 
on Wednesday, 11/14 to complete the hop. 
Winners will be announced on the 
Swirlydoos Blog on Thursday 11/15.  
In order to qualify to win here is what you need to do:

1: Visit all of the blogs and leave a comment on each.
This way we know you were there.
Become a follower if you're not already. 
Take your time.
There are REALLY beautiful things to see along the way.

2: Before you leave each blog, 
look for the “special” words and write it down. 
Once you have visited all the blogs and 
collected all the special words, they will create a sentence. 
3: Finally, go back to the Swirlydoos blog and
leave a comment letting us know how much fun you had,
tell us the sentence that was created with all of
the special words you collected.    
Can't wait to hear from you!
My special word is : MORE
The party continues over at ANGELICA's blog.  Have fun!